Introduction.
If you’re getting into podcasting, editing your audio is a crucial skill to master. Clean, clear audio makes all the difference in how listeners perceive your show.
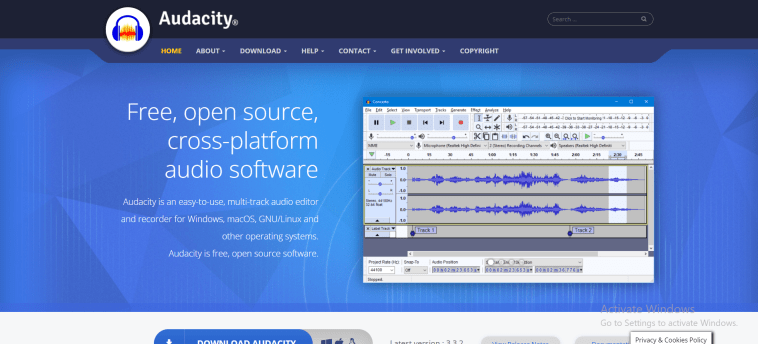
While there are many tools out there, Audacity stands out for its affordability (it’s free!) and robust features.
Learning to edit with Audacity can seem intimidating, especially if you’re new to audio editing. But with the right guidance, you’ll find it’s pretty approachable.
In this article, I’ll walk you through the essentials of editing podcast audio in Audacity, covering everything from trimming and noise reduction to adding effects that make your audio sound more polished.
I’ll also share some pros and cons to consider, answer some common questions, and by the end, you should have the confidence to give your podcast a professional polish using Audacity.
How Do I Edit My Podcast Audio In Audacity?
1. Setting Up Your Project in Audacity.
- Download and Install Audacity: First, if you haven’t already, download Audacity from the official website and install it on your computer.
- Start a New Project: Open Audacity and create a new project by going to
File > New. Save your project right away by selectingFile > Save Project As. Saving frequently is crucial, as Audacity doesn’t auto-save!
2. Importing Your Audio Files.
- Import the audio files you want to edit by going to
File > Import > Audio. You can select multiple files if you’re working with separate tracks for different speakers or elements. - Each file appears as its own track. This setup lets you edit, adjust volume levels, and apply effects to individual tracks without affecting others.
3. Basic Editing Tools and Techniques.
- Selection Tool: This tool allows you to highlight portions of your audio to delete, cut, or isolate.
- Trim & Silence: Removing unnecessary parts, like awkward silences, coughs, or background noises, is essential. Highlight the section to delete, then press
Deleteon your keyboard or go toEdit > Delete. - Split and Join Tracks: Use
Edit > Clip Boundaries > Splitto split a track and isolate sections. You can also join split sections later.
4. Noise Reduction.
- Removing Background Noise: Audacity has a Noise Reduction effect that’s ideal for eliminating low-level background hums or static.
- Highlight a few seconds of background noise.
- Go to
Effect > Noise Reduction > Get Noise Profile. - Then, select the full track, return to
Effect > Noise Reduction, and adjust the settings to your preference.
5. Equalization and Compression.
- Equalization (EQ) helps balance the frequencies, making voices sound fuller or crisper. Go to
Effect > Graphic EQand adjust the sliders to enhance the vocal range (typically between 80 Hz to 250 Hz). - Compression smooths out volume inconsistencies by reducing louder sounds and boosting quieter ones. Use
Effect > Compressorand adjust the threshold and ratio to your taste.
6. Adding Music or Sound Effects.
- If you want background music or transitions, import those audio files just like your main recording.
- Use the
Envelope Toolto adjust the music volume, keeping it low enough so it doesn’t overpower voices.
7. Exporting Your Edited Podcast.
- Once you’re satisfied with the edit, export it as a high-quality MP3 or WAV file. Go to
File > Export, select your desired format, and save.
Pros and Cons of Using Audacity for Podcast Editing
Pros:
- Free and Open Source: Audacity is completely free, and since it’s open source, there’s a large community for support.
- Simple Interface: Despite its many tools, Audacity’s interface is easy to navigate.
- Cross-Platform Compatibility: Audacity works on Windows, Mac, and Linux.
- Robust Editing Features: It includes features like noise reduction, compression, EQ, and more.
Cons:
- Limited Real-Time Editing: Unlike some paid software, you can’t preview effects in real-time.
- No Auto-Save: You must remember to save manually to avoid losing work.
- Basic Effects Library: Audacity has a more limited effects library compared to paid DAWs (Digital Audio Workstations).
FAQ
Q: Can I edit video files in Audacity?
A: No, Audacity is designed specifically for audio editing. You’ll need to convert any video files to audio formats like MP3 or WAV before importing them.
Q: How do I fade in and fade out my podcast audio?
A: Use the Fade In and Fade Out effects. Highlight the section of the track you want to fade, then go to Effect > Fade In or Fade Out.
Q: What’s the best format to export my podcast in?
A: MP3 is the most common format for podcasts due to its compatibility with most platforms. Aim for a bitrate of around 128-192 kbps for good audio quality without creating large file sizes.
Q: Is Audacity suitable for professional podcast editing?
A: Absolutely! Audacity’s feature set, while basic compared to some paid tools, is often more than enough for a professional-sounding podcast, especially if you’re just getting started.
Q: Can I add plugins to Audacity?
A: Yes, Audacity supports VST (Virtual Studio Technology) plugins, which you can use to expand its effects library and add more advanced tools.
Conclusion
Editing podcast audio in Audacity may seem challenging at first, but with a bit of practice, it becomes second nature.
From trimming unwanted sections to balancing your audio and adding effects, Audacity provides all the essentials you need to make your podcast sound great.
Ready to dive in and create a professional-sounding podcast? What’s the first thing you want to edit on your podcast audio using Audacity?


GIPHY App Key not set. Please check settings