Introduction.
When it comes to podcasting, audio quality is everything. Even the most captivating topics and conversations can lose listeners if the sound quality isn’t up to par.
Imagine listening to your favorite show, only to be interrupted by distracting background noise, muffled voices, or that pesky echo.
These small sound issues can drive people away, especially with the growing number of podcasts to choose from today.
Good news? There are plenty of effective, straightforward ways to improve your podcast’s audio quality without diving into overly technical details.
In this guide, I’ll cover practical tips to enhance your podcast’s sound, from affordable equipment upgrades to software tweaks that make a noticeable difference.
Let’s get into it.
How Do I Improve Podcast Audio Quality?
1. Start with the Right Microphone.
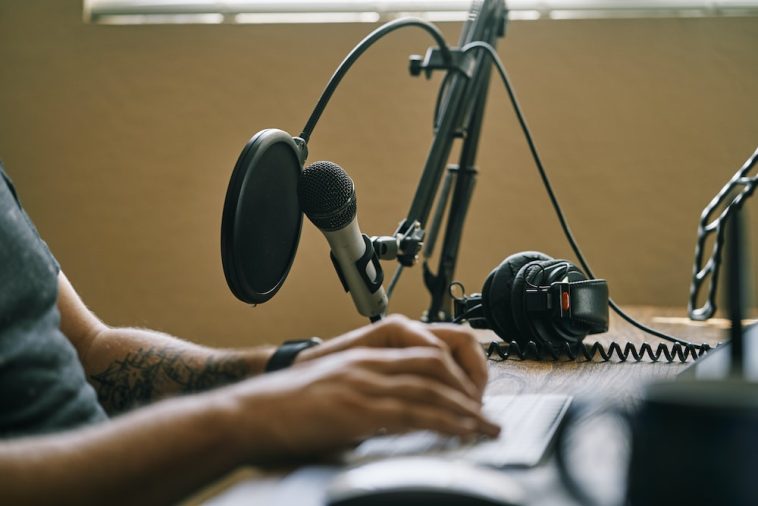
The foundation of any quality podcast is a good microphone. Built-in laptop microphones and phone mics are often too low-quality to capture clear, professional audio.
Opting for a microphone specifically designed for recording is a huge first step toward high-quality sound.
- USB vs. XLR Microphones: USB mics are generally more user-friendly and plug directly into your computer, making them perfect for beginners. However, XLR mics offer higher audio quality and more control options but require an audio interface for connection.
- Popular Picks: The Audio-Technica ATR2100x-USB and Shure MV7 are solid entry-level USB mics. If you want to invest a little more, the Shure SM7B is an industry standard for a reason.
2. Invest in Headphones.
Monitoring your sound while recording helps you pick up on issues in real-time. Closed-back headphones are ideal as they prevent sound from leaking into the microphone and allow you to hear all the details.
- Recommendations: The Audio-Technica ATH-M50x and Sony MDR-7506 are popular among podcasters and offer a good balance between price and performance.
3. Record in a Controlled Environment.
Your recording space has a big impact on audio quality. Room echo, street noise, and even the hum of an air conditioner can interfere with clarity.
- Tips for a Quiet Room: Try to record in a small, carpeted room to absorb sound. Adding items like blankets or pillows around your setup can also help dampen echo. Another option is using a portable isolation shield, which absorbs unwanted background noise.
4. Use a Pop Filter.
Pop filters are simple mesh screens that go in front of your microphone to block “plosives” — those explosive sounds from hard letters like “P” and “B.” A pop filter helps keep the audio smooth, and the best part? They’re inexpensive and easy to attach.
5. Adjust Your Mic Technique.
The way you position yourself concerning the microphone affects the sound. Aim to keep a consistent distance from the mic — about 6-8 inches away is a good rule of thumb. Avoid moving around too much while recording to maintain a steady audio level.
Post-Production Tips to Boost Audio Quality
1. Noise Reduction
Background noise can still sneak in, even with careful recording. Luckily, most editing software, such as Audacity or Adobe Audition, has noise reduction tools. By removing this unwanted sound, you can make your podcast feel much more professional.
2. Volume Leveling and Compression
Volume inconsistencies can be jarring, especially if they differ between speakers or segments. Compression helps smooth out the audio so that louder and softer sounds are more balanced.
Many podcasters use free tools like Audacity or GarageBand for basic compression, while Adobe Audition offers more advanced options.
3. EQ (Equalization)
EQ fine-tunes the frequencies of your audio to make voices sound clearer and more pleasing to the ear. For example, boosting mid-range frequencies often helps vocals stand out, while cutting low frequencies can reduce rumbling sounds.
4. Limiters and Normalization
A limiter prevents the audio from “peaking,” which can cause distortion. Normalization ensures that the overall volume stays consistent across episodes, which can help avoid sudden jumps in loudness for listeners.
Pros and Cons of Improving Podcast Audio Quality
| Pros | Cons |
|---|---|
| Increases listener satisfaction and loyalty | May require some investment in gear |
| Reduces background noise distractions | Takes time to learn editing techniques |
| Attracts a larger audience | Additional post-production is needed |
| Boosts perceived professionalism | Some trial and error may be required |
Frequently Asked Questions (FAQ)
Q: Do I need a professional studio to get good audio?
A: Not necessarily. You can achieve high-quality audio in a quiet, well-treated room with a decent microphone and headphones. You may want to upgrade to a studio eventually, but it’s not a must-have to get started.
Q: How much should I spend on a microphone?
A: For beginners, spending around $70-$150 on a microphone like the Audio-Technica ATR2100x-USB is often enough. For more advanced audio quality, you might consider the Shure SM7B, which costs around $400.
Q: Is post-production software necessary for good audio?
A: It’s not absolutely required, but it does help. Software like Audacity is free and offers great tools for reducing noise, leveling audio, and adding compression. Many podcasters find that a little post-production editing goes a long way.
Q: Can I improve audio quality if I’m recording remotely?
A: Yes! If you’re recording with guests over the internet, using software like Riverside.fm or SquadCast can help capture high-quality, separate audio tracks for each participant, improving sound even with remote recordings.
Q: How do I know if my audio levels are right?
A: Aim for consistent levels. Most podcasters recommend recording at around -6dB to -12dB, leaving room to adjust in post-production. Use your editing software’s volume meter to monitor this.
Conclusion
With the right equipment, a suitable recording space, and some basic editing, improving podcast audio quality is very doable.
The time and effort invested in better sound pay off through increased listener engagement and a more polished, professional feel for your show.
Don’t let audio quality be the factor that keeps people from fully enjoying your podcast!
What steps are you thinking about trying first to upgrade your podcast’s audio?


GIPHY App Key not set. Please check settings