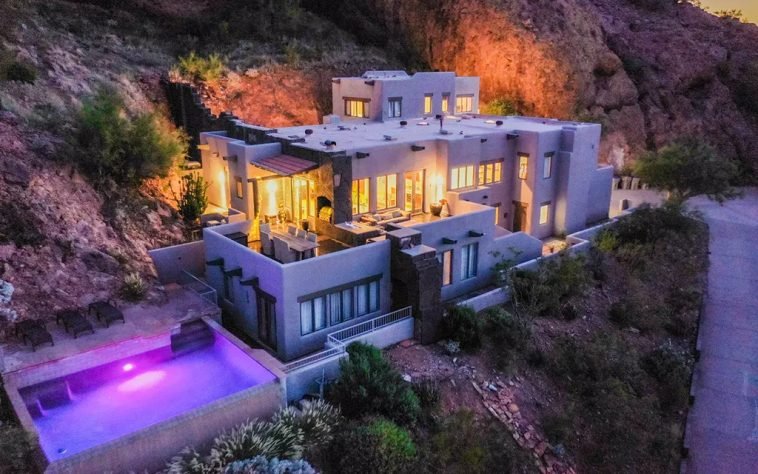
Introduction.
When it comes to listing your space on Airbnb, great photos can make all the difference. I’ve seen firsthand how a few well-taken shots can attract more guests, build trust, and even boost your booking rate by up to 40%, according to some studies.
With an iPhone in your pocket, you have a powerful tool that can capture your space in the best light.
In this post, I’ll share simple tips and tricks that have helped me create inviting photos without needing fancy gear.
I’ll cover everything from setting up your shot to editing your images right on your phone. This guide is meant to be friendly and relaxed—like chatting with a friend who’s been there and done that.
Why Great Photos Matter
Photos are the first thing potential guests see when they’re browsing Airbnb listings. A well-shot image can tell a story about your space—its warmth, style, and comfort—without saying a word.
I believe that good photos don’t just show the room; they invite someone to imagine themselves there.
Statistics show that listings with high-quality photos tend to get more views and bookings. For example, a study mentioned on Airbnb’s help pages points out that professional-looking photos can boost booking rates significantly.
When people see clear, well-lit, and thoughtful images, they’re more likely to trust that the space will be as nice as it appears online. If you want to stand out in a competitive market, great photos are a must.
How Do I Take Airbnb Photos With Iphone?
Getting Your iPhone Ready
Before you even think about snapping a photo, I recommend taking a few steps to prepare your iPhone for the task:
- Clean the Lens: It sounds simple, but a quick wipe with a microfiber cloth can remove dust and smudges that might blur your images.
- Use the Right Settings: Open your iPhone’s camera app and explore settings like HDR (High Dynamic Range), which can help capture more details in bright and dark areas.
- Steady Your Shot: Using a tripod or propping your phone on a stable surface can reduce the risk of blurry images. If you don’t have a tripod, try using a stack of books or something similar.
By starting with these basics, I ensure that every photo you take is as sharp and clear as possible.
Finding the Best Light
Light can make or break a photo. Natural light is your best friend when capturing indoor spaces. I usually recommend shooting during the day when sunlight fills the room. Here are a few pointers:
- Shoot Near Windows: Position your camera so that natural light flows into the room, but be careful not to have the sun directly behind you, which can cast unwanted shadows.
- Turn Off Overhead Lights: Artificial lighting can sometimes make a space look harsh. Instead, rely on soft, natural light and add lamps if needed to balance the lighting.
- Experiment with Angles: Sometimes, even a small change in where you stand can make a big difference in the way light plays in the room.
Good lighting highlights the best features of your space and creates a warm, welcoming atmosphere that can make guests feel right at home.
Staging Your Space
Before you start snapping away, take a little time to stage your space. A tidy, well-decorated room feels more inviting. Here’s what I usually do:
- Declutter: Remove any personal items or clutter. I find that a clean space helps guests imagine themselves living there.
- Add Personal Touches: A vase of fresh flowers, a neatly arranged bookshelf, or a cozy throw can add charm and warmth.
- Highlight the Best Features: Whether it’s a great view, a unique piece of furniture, or an interesting architectural detail, make sure these elements are in clear view.
Staging isn’t about hiding imperfections; it’s about showcasing your space’s true potential.
Composing Your Shots
Composition plays a key role in how your photos are perceived. I like to follow a few simple guidelines:
- Use the Rule of Thirds: Instead of centering everything, imagine your frame divided into a grid and place key elements along those lines. Most iPhone camera apps offer a grid overlay to help you with this.
- Show Multiple Angles: Capture a room from different angles. A wide shot gives an overall view, while a close-up can highlight special details.
- Keep It Simple: Don’t overcrowd your frame. I find that simplicity helps the viewer focus on the most important aspects of the space.
- Include Context: Sometimes, including a bit of the surrounding area can give a better sense of scale and layout.
Taking your time to compose each shot can make a big difference in the overall quality of your photos.
Editing Your Photos on iPhone
After you’ve taken your photos, a little editing can enhance their appeal. I like to use free apps like Snapseed or VSCO, which offer user-friendly editing tools. Here are a few basic editing tips:
- Adjust Brightness and Contrast: This can help bring out details in both the light and dark areas of your photo.
- Correct the Color Balance: Sometimes, the colors might seem a bit off. A small tweak can make your room look more natural.
- Crop and Straighten: If your shot isn’t perfectly aligned, use the crop tool to straighten it. This simple step can make your images look much more professional.
- Avoid Over-Editing: It’s tempting to use filters, but I usually keep it natural. The goal is to show your space as accurately as possible.
With these tools, even someone with little editing experience can make their photos pop.
Extra Tips for Capturing the Perfect Shot
Here are some extra ideas that I’ve found helpful when using my iPhone for Airbnb photography:
- Use Burst Mode: If you’re trying to capture movement or a changing scene, burst mode can help you pick the best shot.
- Experiment with Angles: Sometimes, shooting from a lower angle can make a room feel more spacious, while a higher angle might capture more of the layout.
- Take Detail Shots: Don’t forget to capture unique features like artwork, decorative items, or special amenities. These details add personality and tell a richer story about your space.
- Keep it Consistent: Consistent lighting and angles across all your photos help create a cohesive look for your listing.
Taking a little extra time with these details can set your listing apart and draw in more guests.
FAQs
What time of day is best for taking Airbnb photos with an iPhone?
I find that shooting in the morning or late afternoon works best because the light is soft and warm. This helps bring out the natural beauty of your space.
Do I need to use any special apps?
While the built-in camera app on your iPhone is great, I often use Snapseed or VSCO for editing. Both are free and offer excellent features for beginners.
How do I avoid blurry photos?
Keeping your phone steady is key. If you can’t invest in a tripod, try resting your phone on a stable surface. Also, consider using the timer function to minimize camera shake.
Is it necessary to stage my space?
Absolutely. A well-staged room not only looks better in photos but also helps potential guests envision themselves in your space. Even small touches can make a big difference.
Can I take good photos if my space isn’t perfect?
Yes! Focus on showcasing the best parts of your space, and use your editing tools to enhance the images. Authenticity is important, but a little tweaking goes a long way in making your listing look inviting.
Additional Resources
If you’re looking for more ideas or detailed guides, here are a few resources that I’ve found incredibly useful:
- iPhone Photography School: Offers a range of tutorials and tips specifically for iPhone users. Check it out at iphonephotographyschool.com.
- Airbnb Community Center: A great place to exchange ideas and tips with other hosts. Visit the Airbnb Community Center for inspiration and advice.
- Snapseed App: Learn more about editing your photos with Snapseed through tutorials on YouTube or the app’s help section.
These resources can provide you with more detailed tips and creative ideas to keep your photography skills sharp.
Final Thoughts
I hope this guide helps you see that taking great Airbnb photos with your iPhone is within reach. It doesn’t require professional equipment—just a little know-how, some patience, and a few simple techniques.
Remember, the photos you choose to share online are a key part of your story. They give potential guests a glimpse into what makes your space special.
I encourage you to take your time, experiment, and even ask for feedback from friends or family. The more you practice, the more confident you’ll become in showcasing your home.
So, after all these tips and insights, how will you take your next Airbnb photos with your iPhone?
How To Take Airbnb Photos With Iphone?


GIPHY App Key not set. Please check settings