Introduction.
Setting up a podcast takes creativity, planning, and the right software to produce that clear, polished audio that hooks listeners.
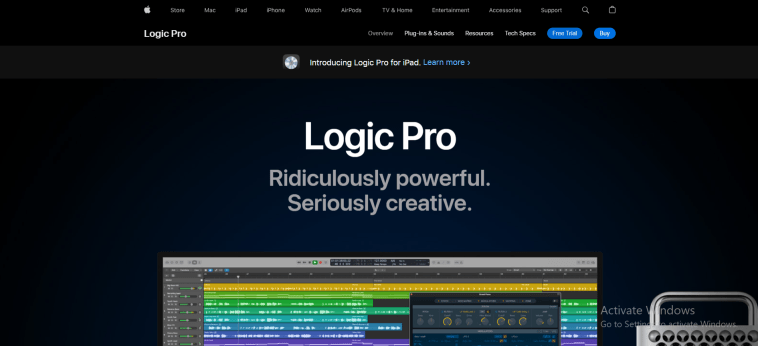
Logic Pro X is one of the most powerful digital audio workstations (DAWs) out there and a favourite among podcasters for good reason.
Originally known for music production, Logic Pro X has all the advanced features and tools needed to produce a professional-quality podcast—from recording and editing to adding sound effects and finalizing the mix.
In this guide, I’ll break down how to use Logic Pro X for podcasting, walking you through the setup, recording process, and editing tools that can make your show sound amazing.
How Do I Use Logic Pro X For Podcasting?
Before diving into recording, let’s get Logic Pro X set up specifically for podcasting:
- Create a New Project
Open Logic Pro X and create a new project. Choose the “Empty Project” option to start with a clean slate, which is ideal for podcasts. - Set Up Audio Tracks
Depending on the number of people on your podcast, add the necessary audio tracks. For solo podcasts, you’ll need one track, but for interviews or co-hosts, add multiple tracks—one per speaker. This setup allows for easier editing and balancing. - Select Your Input and Output Devices
Go to Logic Pro X > Preferences > Audio to select the input and output devices. Connect your microphone or audio interface and select it as the input device. Choosing the right microphone and ensuring it’s connected correctly is key to capturing high-quality audio. - Adjust Sample Rate and Buffer Size
For podcasts, a sample rate of 44.1 kHz and a buffer size of 256 or 512 samples is standard. These settings provide a balance between audio quality and system performance, so you avoid lagging during recording. - Save Project
Save your project with a clear name and organized file structure. Label each track to easily identify speakers or sound effects during editing.
Recording Your Podcast in Logic Pro X
- Warm-Up and Sound Check
Run a brief sound check and test each microphone to check the levels. Adjust the gain on your audio interface to prevent clipping, which can distort audio quality. - Start Recording
Click the “Record” button on Logic Pro X (or press the shortcutRon your keyboard). Keep an eye on the waveform to ensure sound is being picked up correctly. For interviews, record each speaker on a separate track, which simplifies editing later. - Use Markers for Easy Navigation
During long recording sessions, set markers for key points or segments. Markers are useful if you plan on editing or rearranging segments later, helping to keep your content organized.
Editing Tools in Logic Pro X
Once you’ve recorded your episode, it’s time to make it sound polished. Logic Pro X offers plenty of editing tools for this:
- Cutting and Trimming Audio
Use the Scissors tool to cut sections where there are mistakes, pauses, or background noise. This is also handy if you want to remove “ums,” “uhs,” or other filler words that disrupt the flow of conversation. - Noise Reduction
For cleaner audio, use the Channel EQ plugin to filter out low-level background noise, like hums or hisses. Experiment with the settings to reduce noise without affecting the clarity of voices. - Add Compression and EQ
Logic Pro X’s built-in compressor and EQ plugins allow you to refine your audio quality. Compression evens out volume levels, making it easier for listeners to hear every speaker at the same volume. EQ helps with vocal clarity by boosting or cutting specific frequencies. - Panning and Volume Adjustments
Adjust panning to position each voice in a unique spot within the stereo field. This technique works well if you have multiple speakers, giving a natural “in-the-room” feel. Volume adjustments also help create a balanced mix. - Add Intros, Outros, and Background Music
Drag and drop any intro, outro, or background music directly into Logic Pro X. You can add effects, adjust volume levels, and automate fades to ensure smooth transitions. - Crossfades and Smooth Transitions
To create smooth transitions between segments, apply crossfades. Crossfades help blend audio and eliminate sharp cuts between different sections.
Exporting Your Podcast Episode
- Bounce the Project
Once your episode sounds polished, it’s time to export. Go to File > Bounce > Project or Section to export your podcast as an audio file. For podcasts, MP3 or AAC formats work well for online streaming. - Set Export Parameters
Export with settings between 128 to 192 kbps for a balance of sound quality and file size. A 128 kbps MP3 or AAC file is often recommended for spoken audio like podcasts, offering clear quality without huge file sizes. - Save Your Work
Be sure to save and back up your project. It’s also helpful to keep the raw Logic Pro X file in case you need to make edits or re-export the episode later.
Pros and Cons of Using Logic Pro X for Podcasting
Pros:
- Professional-Quality Audio: Offers powerful editing tools, including EQ, compression, and noise reduction.
- Flexible Editing Options: Multi-track recording and panning capabilities make it easy to work with multiple speakers.
- Built-In Plugins: Comes with all the effects and plugins you need without additional purchases.
Cons:
- Steeper Learning Curve: The advanced features can feel overwhelming for beginners.
- Mac-Only Software: Logic Pro X is only available on macOS, so it’s not compatible with Windows.
Frequently Asked Questions (FAQ)
1. Can I use Logic Pro X on Windows?
No, Logic Pro X is only available for macOS users. For Windows, alternatives like Audacity or Adobe Audition are popular for podcast production.
2. How much does Logic Pro X cost?
Logic Pro X costs a one-time payment of $199.99 on the Mac App Store. While the price is higher than some alternatives, it includes a wide range of tools and effects that many find worth the investment.
3. Can I import my audio files into Logic Pro X?
Yes, you can easily drag and drop audio files into Logic Pro X to add them to your project. This includes music, sound effects, or pre-recorded segments.
4. How can I reduce background noise?
Logic Pro X’s Channel EQ plugin can help filter out low-level background noise. Additionally, recording in a quiet space and using a quality microphone with a pop filter can minimize unwanted noise.
5. Do I need any extra plugins for podcasting?
Not necessarily. Logic Pro X includes many built-in plugins that are enough for most podcast editing. However, some podcasters invest in third-party plugins for specific needs, like advanced noise reduction.
Conclusion
With its powerful tools and high-quality effects, Logic Pro X is an excellent choice for podcasters looking to produce professional-sounding episodes.
Although it has a bit of a learning curve, the wide array of plugins and editing features give you everything you need to create polished, engaging audio.
Ready to try out Logic Pro X for your next episode? What’s one feature you’re most excited to use in your podcasting process?


GIPHY App Key not set. Please check settings