Introduction.
As the use of digital devices continues to grow, so does the need for effective writing tools that can be seamlessly integrated into our daily lives.
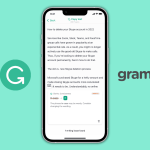
Grammarly, a popular online writing assistant, has developed a user-friendly app for iPad users that allows for convenient access to its powerful features.
Whether you’re writing an email, working on a document, or crafting a social media post, Grammarly on iPad can help you enhance your writing skills, correct grammar and spelling mistakes, improve clarity, and even check for plagiarism.
In this guide, we will walk you through the steps of using Grammarly on your iPad, enabling you to elevate the quality of your writing effortlessly.
How Do I Use Grammarly on my iPad?
Grammarly, a popular online writing assistant, offers an intuitive app for iPad users that allows you to elevate the quality of your writing effortlessly.
In this article, we will provide a comprehensive guide on how to use Grammarly on your iPad, enabling you to produce error-free and polished content.
Step 1: Download and Install the Grammarly App.
To get started, head to the App Store on your iPad and search for “Grammarly.” Tap on the “Get” button to download and install the app. Once the installation is complete, locate the Grammarly app on your home screen and open it.
Step 2: Log in or Create a Grammarly Account.
Upon launching the Grammarly app, you will be prompted to log in or create a new account. If you already have a Grammarly account, simply enter your login credentials.
If not, tap on the “Sign up” option to create a new account. You can either use your email address or sign up with your Google or Facebook account.
Step 3: Grant Necessary Permissions.
To fully utilize Grammarly’s features on your iPad, you’ll need to grant certain permissions. These permissions may include accessing your keyboard and text input. It’s important to allow these permissions to enable Grammarly’s full functionality.
Step 4: Enable the Grammarly Keyboard.
To take advantage of Grammarly’s real-time suggestions and grammar checks, you need to enable the Grammarly Keyboard on your iPad.
Open the Settings app, navigate to “General,” then “Keyboard,” and select “Keyboards.” Tap on “Add New Keyboard” and choose “Grammarly” from the list of available keyboards.
Finally, tap on “Grammarly” again and toggle on the “Allow Full Access” option. This ensures that Grammarly can analyze your writing as you type.
Step 5: Start Writing with Grammarly.
With the Grammarly Keyboard enabled you can begin using Grammarly in various apps on your iPad.
Whether you’re writing an email in the Mail app, composing a document in Pages or Google Docs, or even typing a message in social media apps like Facebook or Twitter, Grammarly will automatically activate and start checking your writing for errors, clarity, and style.
Step 6: Utilize Grammarly’s Additional Features.
Grammarly offers a range of additional features beyond grammar and spelling checks. Take advantage of these features to refine your writing and improve its overall quality.
For instance, Grammarly provides style suggestions to help you find the right tone and clarity for your content.
It also offers readability analysis to ensure that your writing is easily comprehensible to your target audience. Furthermore, Grammarly’s vocabulary enhancements can help you find more precise and impactful words.
And if you’re concerned about plagiarism, Grammarly’s app also includes a plagiarism checker to ensure the originality of your work.
Step 7: Review Grammarly’s Suggestions.
As you write with Grammarly enabled, the app will provide real-time suggestions and corrections for grammar, spelling, punctuation, and clarity.
Pay attention to the underlined sections in your text, as they indicate areas that could benefit from improvement.
Grammarly’s suggestions are designed to enhance your writing and make it more polished and professional.
Step 8: Make Final Edits and Revisions.
Once you have finished writing, take the time to review the suggestions provided by Grammarly. Evaluate each suggestion and make any necessary edits or revisions to your content.
Remember that Grammarly is a tool, and ultimately, you have the final say in how you want your writing to be.
Consider the context, audience, and style as you incorporate Grammarly’s suggestions into your final draft.
Conclusion.
Grammarly is an invaluable tool for iPad users who want to improve their writing skills and produce high-quality content.
By following the steps outlined in this guide, you can easily download, install, and utilize the Grammarly app on your iPad.
With real-time suggestions, grammar and spelling checks, style enhancements, readability analysis, and a plagiarism checker, Grammarly provides a comprehensive writing assistant right at your fingertips.
So, whether you’re writing an important email, creating a document, or engaging with others on social media, let Grammarly on your iPad elevate the quality of your writing and help you communicate with confidence.


GIPHY App Key not set. Please check settings